Please be patient as this page loads; it is graphics heavy.
This will be a wallpaper featuring actress Barbara Babcock as Philana in the original Star Trek episode “Plato’s Stepchildren”. As soon as I saw the main picture, I knew I wanted to use it in a wallpaper.
As a general guideline, ideally never use images for creating wallpapers which are smaller in height than your final wallpaper- if you design for 1024×768 the images you use should be double that, or at the very leastt as high. You can always downsize but not so easily enlarge, particularly if the scanner/capper didn’t know what they were doing and compressed the image too much when they saved them.
I used Photoshop CS for this, but I don’t think there’s anything here that you can’t do in an earlier version of Photoshop or with PaintShop Pro with a little adapting your method. Mostly it’s just changing layer modes and opacities.
I do all my wallpapers for the screen resolution 1152×864 but you can of course use your own resolution. Below are the caps I used for this wall but you can of course try using your own pics – I of course can’t even guess what kind of results you’ll get then though and I’d love to see them 🙂
The textures I used are linked to in each step. For the most part the textures I used are from tre-texture and tbe with one or two unknown thrown in.
Note: click on all pics to view in their actual size.
Needed caps:


1. Start a new image, sized 1152×864 or whatever size you use for you wallpapers, make sure the background is black, or fill it that color once it’s open. Save with a name – I named mine Philana wall.psd.
2. Open the main picture (3×10-PlatosStepchildren0257-Ar.jpg) and resize it to 1152×864 or whatever your resolution is. Duplicate to Philana wall by right-clicking on the background layer in the layer selection area:

Then close the main pic. You should now have the black backround and the main Philana pic in the wallpaper. Rename the main pic to “main” and this is what you should have now:

4. Open Picture #2 and resize, duplicate to the Philana wall and close it. Rename to Picture #2. Do the same to Picture #3 but of course rename it to Picture #3. You should now have this:

5. Next we need to position the images. I want the main image’s face to be in the middle, so I move that layer on the top and drag the layer a little to the right to center the image.
6. The Picture #3 picture is a little too small, so go to Edit -> Free transform, then hold Shift down (so that the image stays in the correct aspect ratio) and drag the picture outwards from one of the corners until happy with the size. If you drag inwards, the picture gets smaller. This is what I have now:

8. To see how I want to position Picture #2 and #3, I lower the opacity #3 and Main so that I can see all the pictures. You can do this by lowering just the opacity (a) or fill (b) or combination of both. This is what I have now:

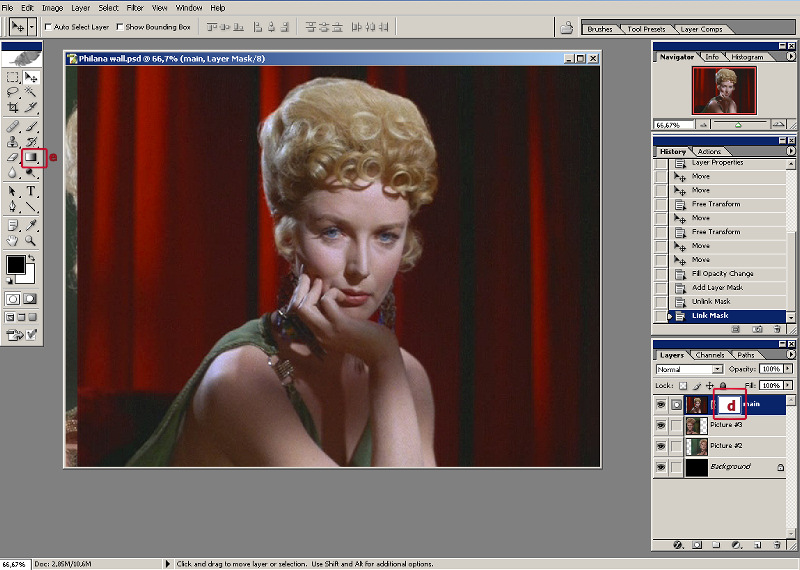
9. Next step is to fade the images to one another. I return the opacities and fills to 100%, put the main picture on top and while it’s still selected click on the Mask button (c).
10. Main picture layer now has a white square (d in the picture below) added to it in the layer selection area. I’m going to use the gradient fill (e) to fade the main picture to #3 which is below it.
11. Make sure you have the mask selected (the white square) and click on the gradient fill. (You can lower the opacitiy of the layer so that you can see the picture underneath faintly if you don’t remember how it’s positioned.) Then click on the main picture somewhere under Philana’s left eye (1), and drage to left and release (2). Return opacity to 100%. Below is my result of this step. (If you entire picture went black & white, you didn’t have the mask selected. Undo and click on the mask and try again.)

In the layer selection area, you’ll notice that the mask square is blackened out where you faded it out. You can do the dragging as many times as you need to by just clicking where you want to start.
12. To make it look better, still have the mask selected, and unmask some areas using Brush set at 10, 20 and 50% opacity. On larger areas I used brush size around 230 and for more detailed work (the red at the hair line) I zoomed in 200% and used brush sized 30. In the picture below I marked the areas with read, and the picture below that one is my result after this step.


13. Now to work on fading Picture #2. Bring on the top and put a mask on it. Using the gradient fill and brush fade it until you’re happy with the result. Below is mine.

14. I’m happy with how everything looks now, so I’ll apply and delete the masks. NOTE: once you do this step you can’t edit the masks anymore. I highly recommend you save it now before you apply and delete anything, and keep this as a base in case you should need it later on by saving everything after this step into as a different PSD and work only with that one.
Make sure you have a mask selected and then click on the trash can in the layer selection area. When it asks whether you want to apply the mask, click YES. Repeat on the remaining mask.
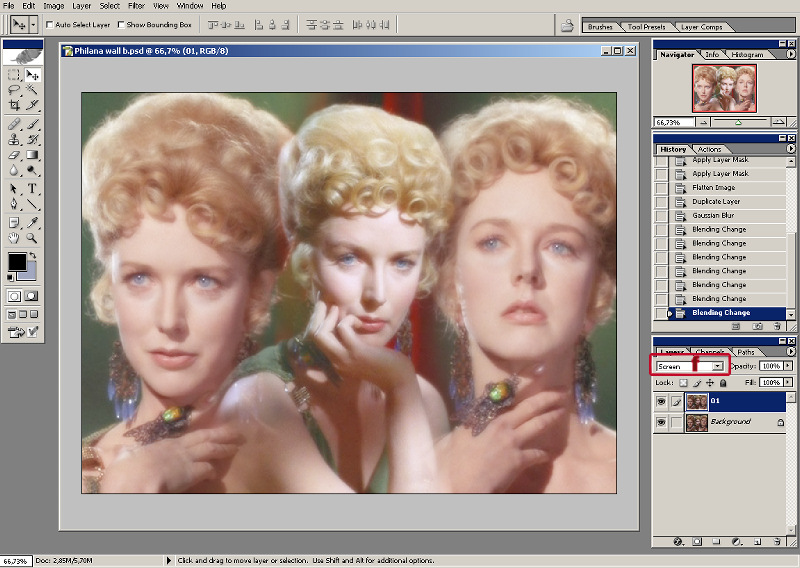
15. Flatten image (Layer ->Flatten Image) and duplicate the new background. Name the new layer to 01. Save with a different name – I named mine Philana wall b.psd.
16. This is where the fun starts 😀 Make sure you have the 01 selected. Go to Filter ->Blur-> Gaussian Blur and use the setting 5,0. In the layer selection area, make the layer mode (f in the pic below) Screen. Below is my result.
17. Dublicate Background again, and apply the same blur as in previous step. Name the new layer to 02 and put on top. Change the layer mode to Overlay. Again my result is below.

18. Now we’ll start playing with textures. Open  and resize to 1152×864 or whatever size wall you are doing, duplicate to the wallpaper and dragged it on top. Change layer mode to Overlay. This is called Layer 1.
19. Open  resize and duplicate to the top. Change layer mode to Soft Light. Apply Gaussian Blur on setting 20. This is called Layer 2.
20. Change the layer mode of Layer 1 to Multiply and apply Gaussian Blur with same settings as in previous step. Below is my result.

21. Open  resize and duplicate to the wallpaper. Set the layer mode to Multiply, and put in a mask. Use a big sized (around 400) brush at opacity 20% or so to mask out the black area at the right hand corner. Apply the mask and delete it. Save!
My result is below.

22. I like the colors now so it’s time to start looking for a texture or effect that gives some texture to picture.  is one of my favorite textures for that purpose, so open it up, resize and duplicate. It’s Layer 4. Change layer mode to Overlay and drag it over Background layer in the layer selection area. You should now have this:

23. Played some more. These are what I kept:
Open, resize and duplicate
It’s Layer 5. Apply Gaussian Blur on setting 20. Drag the layer on top of Layer 4. Change layer mode to Screen.
Open, resize and duplicate
This is my result:


Here’s my final result:

and another version:
